> For the complete documentation index, see [llms.txt](https://ce-docs.keywordrush.com/llms.txt). Markdown versions of documentation pages are available by appending `.md` to page URLs; this page is available as [Markdown](https://ce-docs.keywordrush.com/modules/feed-modules/field-mapping.md).
# Field mapping
Product feeds can vary significantly in structure, depending on the source or affiliate network. To ensure accurate data import, each feed must be mapped to Content Egg’s internal product fields. This process is required for **every individual feed**.
### Automatic Field Mapping
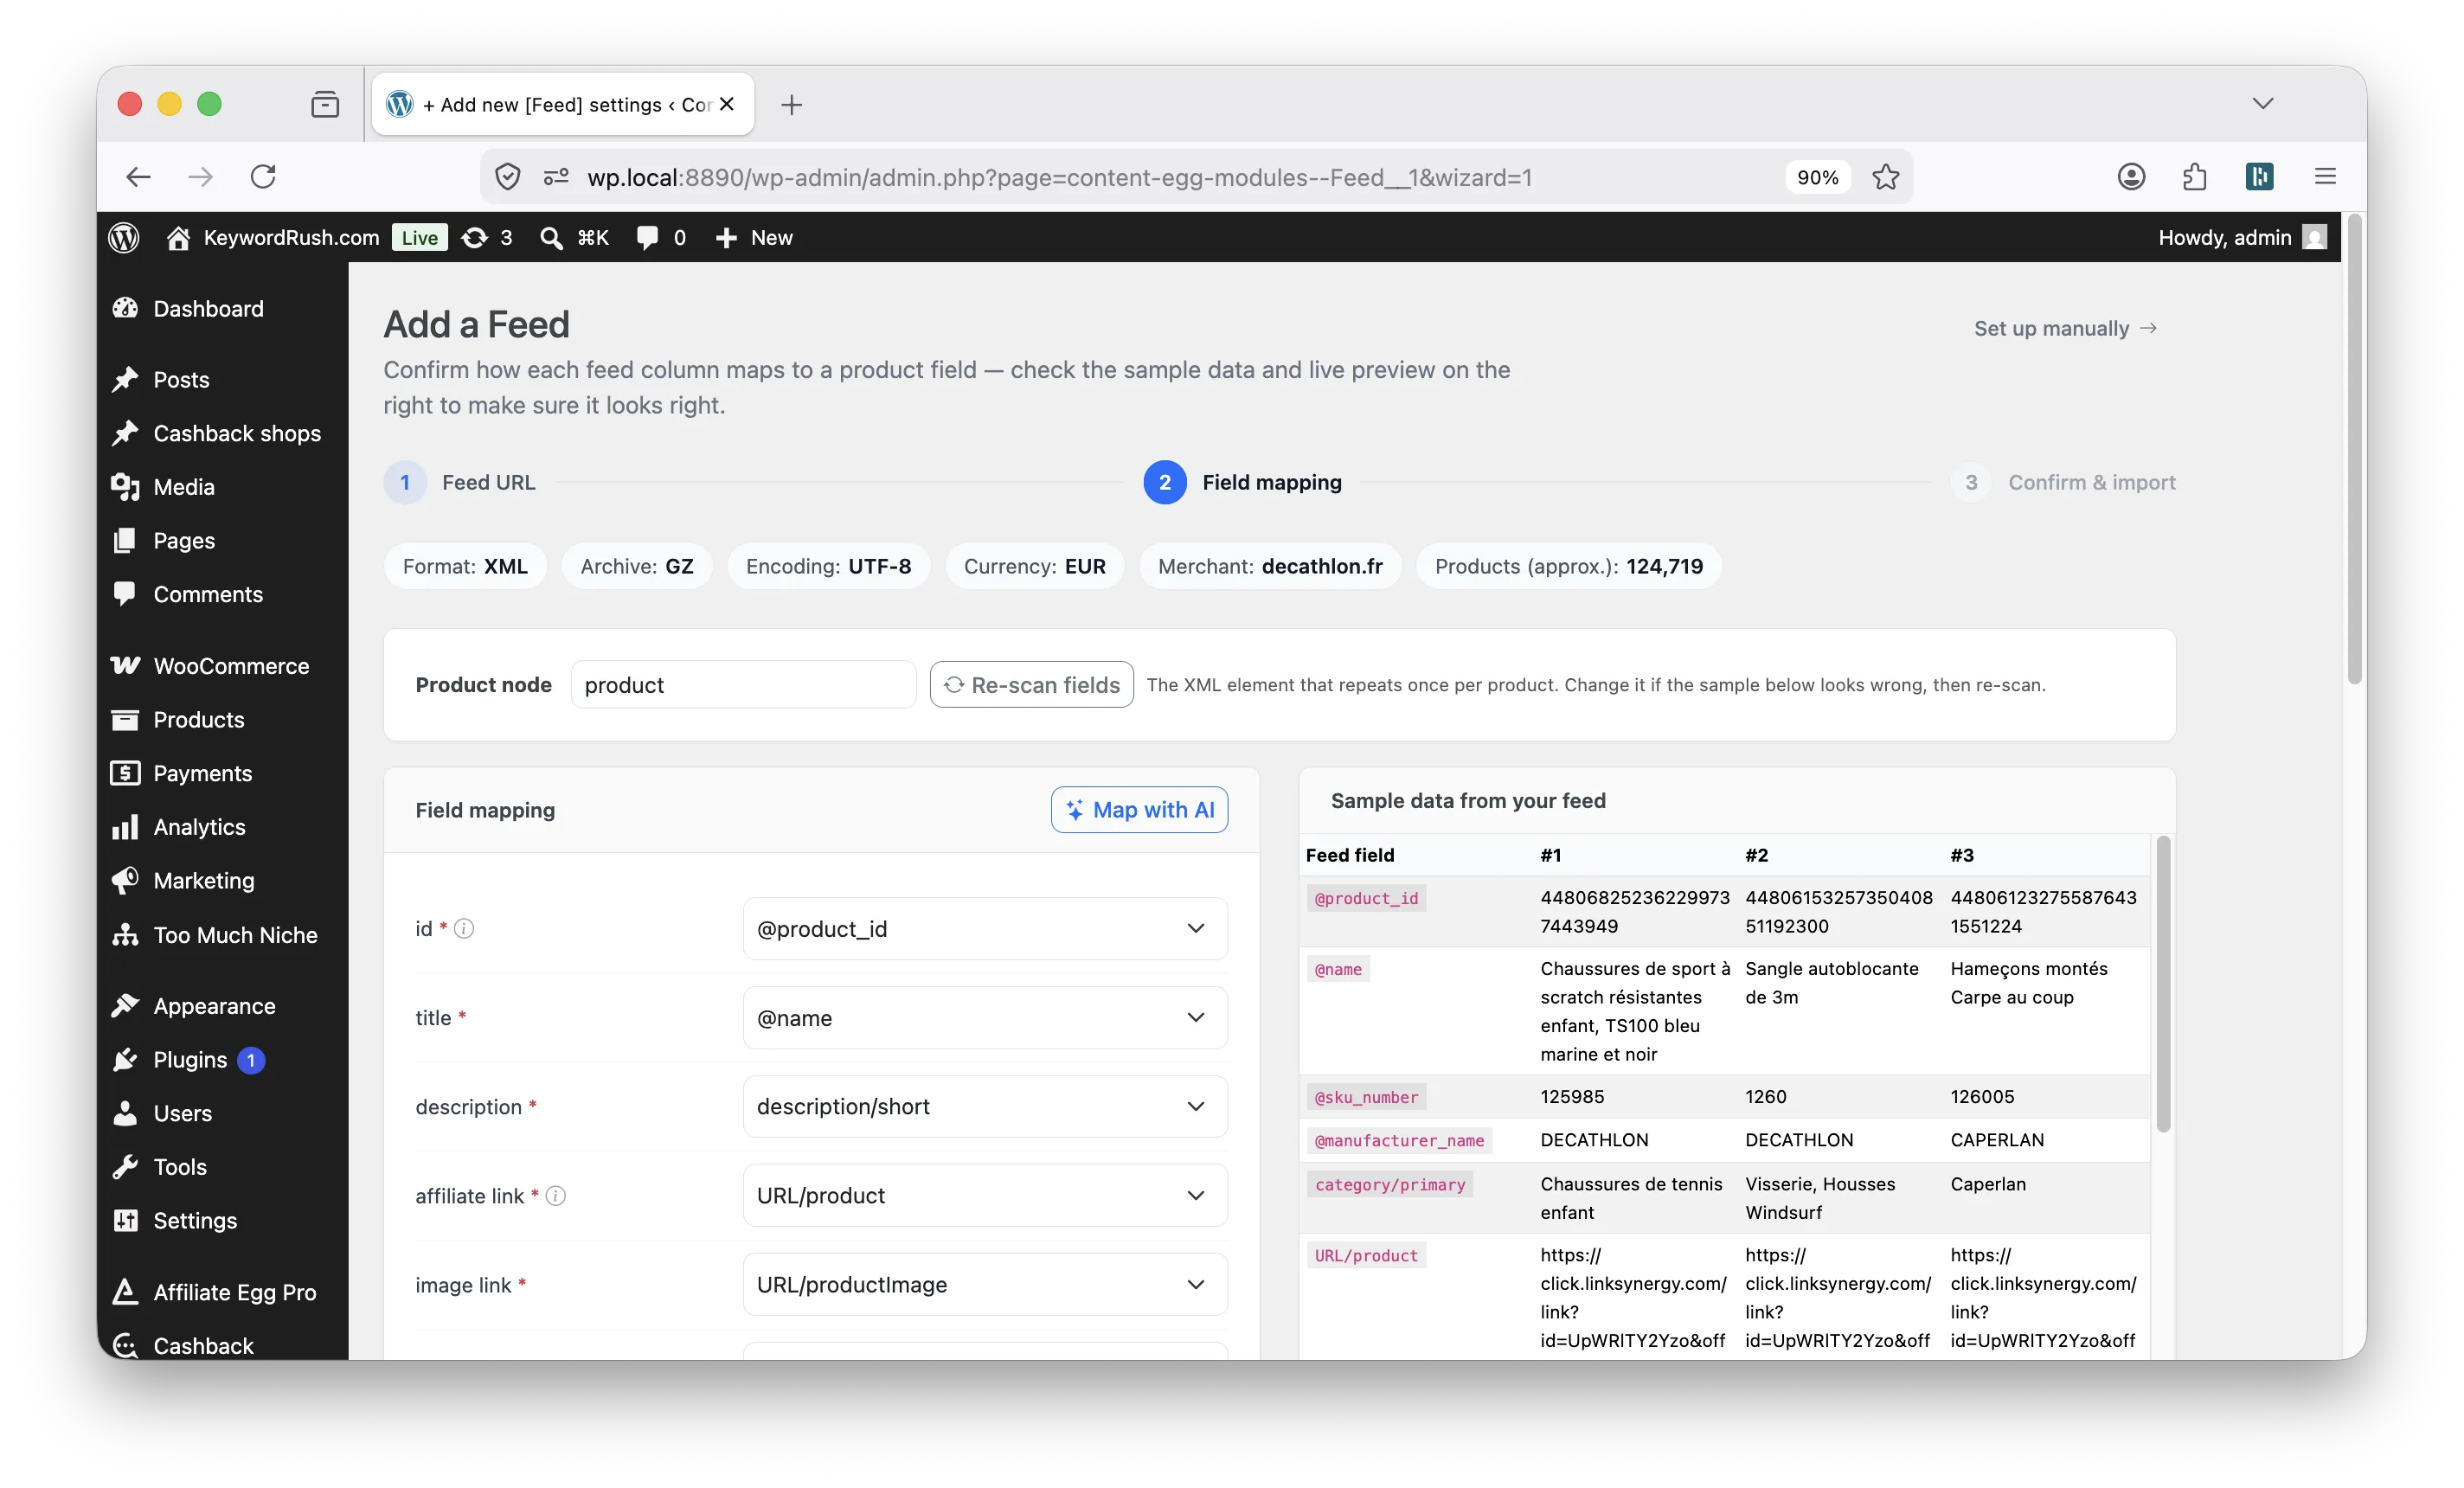
You rarely have to map fields by hand. When [adding a new feed](/modules/feed-modules/general-information.md#the-setup-wizard), the setup wizard already fills in some fields for you automatically, based on common feed field names — this is a deterministic match, not AI. For anything it couldn't confidently match, click **Map with AI** to fill in the rest, or finish mapping any remaining field manually. Real sample rows from your feed and a live product preview sit right next to the mapping panel, so you can confirm everything looks right before importing anything.
{% hint style="info" %}
The **Map with AI** button is disabled until an **OpenAI API key** is added under `Content Egg > Settings > AI`.
{% endhint %}
The rest of this page covers the mapping syntax in more detail — useful when editing an existing feed's mapping directly in the module settings, or when you need an XPath/regex expression the wizard's dropdowns don't offer.
### CSV Feeds Mapping
Match each column header from your feed to the appropriate plugin field:

**Common CSV Field Mappings:**
| Plugin Field | Description |
| ---------------- | ---------------------------------------------------------------------------------------- |
| `id` | **Required.** Unique identifier for each product. Must remain consistent across imports. |
| `affiliate link` | The product's affiliate URL, including your tracking parameters. |
| `is in stock` | Stock status. Supported values: `1`, `true`, `on`, `yes`, `0`, `false`, `off`, `no` |
| `availability` | Text-based stock status. Supported values: `in stock`, `out of stock` |
| `direct link` | Direct (non-affiliate) URL to the original product page |
| `gtin` | Global Trade Item Number, such as EAN-13 (e.g., `3001234567892`) |
{% hint style="info" %}
Some fields are required, such as `id`, while others are optional. However, including more fields improves matching, filtering, and comparison quality.
{% endhint %}
{% hint style="info" %}
The wizard shows these same explanations as an **(i)** icon next to each field in the mapping panel, so you don't need to come back to this table while setting up a new feed.
{% endhint %}
### XML Feeds Mapping
{% hint style="warning" %}
**Tip:** If XML parsing fails, try switching the **XML processor** to **XmlReader** in the module settings.\
XmlReader handles nested and complex XML structures more reliably.
{% endhint %}
If your feed is in **XML format**, you'll map fields using either XML node names or XPath expressions — the same syntax works whether you're mapping in the wizard or the classic settings form:

**Example: Node Attribute Mapping**
You can directly select attributes from a node. For example:
```xml
```
You can map the image URL using:
//image/@url
**Example: Using XPath for Namespaced Nodes**
For more complex XML structures or namespaced elements, XPath expressions are supported:
```xpath
.//*[local-name()='media:thumbnail']/@url
```
This XPath selects the `url` attribute of a `` element, even if it uses a namespace.
### Extract Data with Regex
You can extract specific data from a feed field using a custom syntax that incorporates a regex pattern:\
**`[regex][pattern][feed_field_name]`**
This allows you to define a pattern to match and extract the desired portion of the data within the specified feed field.
**Example Use Case:**
Consider a feed containing a **"fields"** field that combines multiple pieces of product data. To extract the value of a specific key, such as **"from\_price"**, you can use the following syntax:
```plaintext
[regex][/from_price:([\d.]+) EUR/][fields]
```
**Explanation:**
* **`[regex]`**: This indicates you are using a regex-based extraction.
* **`/from_price:([\d.]+) EUR/`**: The regex pattern to match.
* **`[fields]`**: The feed field from which data will be extracted.
Use capturing groups **`()`** to define the exact portion of the match you want to extract.
### Product Attributes
You can map any fields from your CSV feed as product attributes, which can then be used to import WooCommerce attributes or display attributes via shortcode.
For example, if your feed includes columns like `delivery_weight` and `delivery_time` that you want to map as attributes, add them to the "attributes" mapping settings as follows:
`delivery_weight,delivery_time`
These fields will then appear as product attributes:
To customize their display names, update the "attributes" mapping like this:
`delivery_weight->Delivery Weight,delivery_time->Delivery Time`
The result will appear as shown: