> For the complete documentation index, see [llms.txt](https://ce-docs.keywordrush.com/llms.txt). Markdown versions of documentation pages are available by appending `.md` to page URLs; this page is available as [Markdown](https://ce-docs.keywordrush.com/set-up-products/how-to-add-products.md).

# Add & manage products

Content Egg follows one simple loop:

> **Modules** fetch product data → the **Product Manager** searches and attaches products to your post → **blocks** render them on the page.

This page covers the middle step: finding products and attaching them to a post in the **block editor**.

{% hint style="info" %}
Using the **classic editor** or a **custom post type** like WooCommerce products? The workflow is identical — only the location differs. See **Classic editor & custom post types** *(guide coming next)*.
{% endhint %}

{% hint style="warning" %}
Search only spans modules that are **active and configured**. If a network is missing from your results, activate its module first — see [Modules](/modules/general-information.md).
{% endhint %}

## Where products are managed

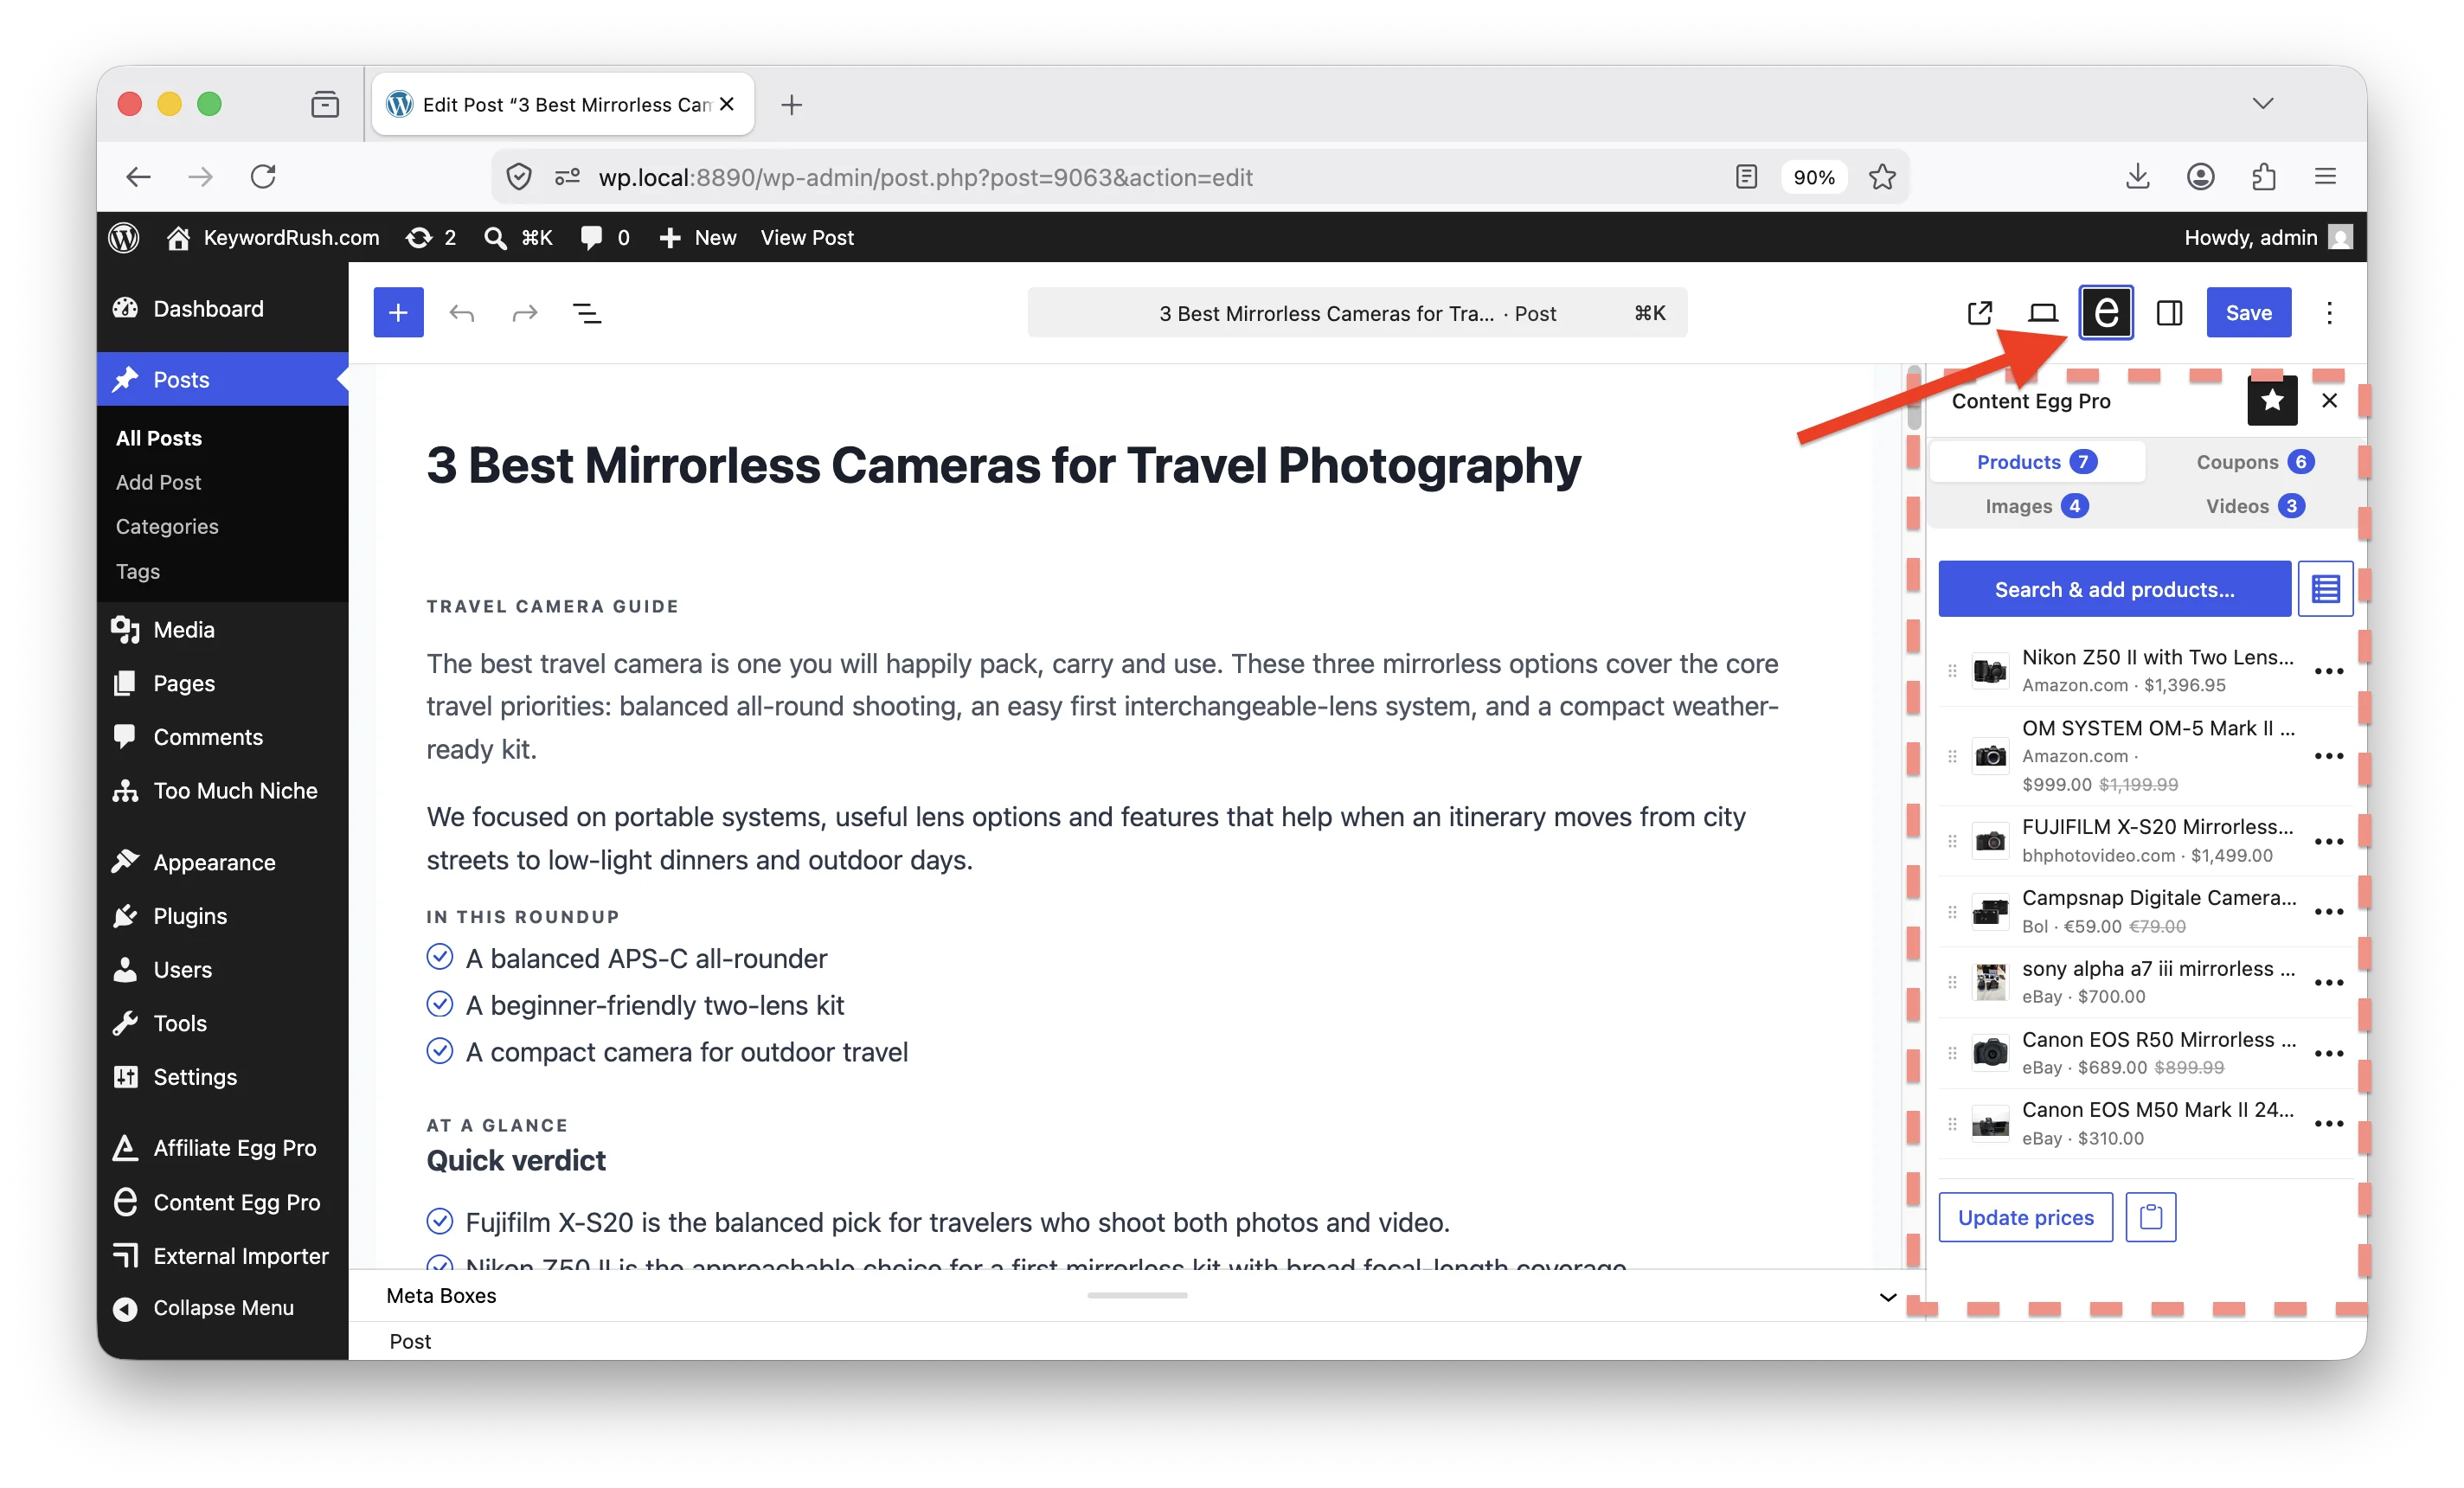
In the block editor, open the **Content Egg** panel from the egg icon in the top-right plugin area. By default it's a compact **Products** panel in the right sidebar, listing the products attached to this post. The panel has a tab for each family — **Products**, **Coupons**, **Images**, and **Videos**. This guide uses **Products**; the other families work exactly the same way.

<figure><img src="/files/k32ZhXynx6KEJ9blX1tN" alt="The Content Egg panel in the block editor, listing attached products"><figcaption><p>The Content Egg panel — your attached products for this post</p></figcaption></figure>

{% hint style="info" %}
**Choose your interface.** Change how the manager appears at **Content Egg → Settings → Egg Blocks → Product manager interface**:

* **In-editor sidebar** *(default)* — the compact Products panel beside the editor.
* **Full product manager** — the full search & manage screen shown inline, instead of opening as a modal.
* **Classic metabox** — the older interface. *Deprecated; it will be removed in a future version.*
  {% endhint %}

{% hint style="info" %}
**Same manager everywhere.** In the classic editor and on custom post types (including WooCommerce products), the same manager appears in the right sidebar — identical to the block-editor panel. Only the mount differs; everything on this page applies there too. See [Classic editor & custom post types](/set-up-products/classic-editor.md).
{% endhint %}

## The Products panel

The panel lists the products already attached to this post — thumbnail, title, price, and quick actions. From here you can:

* **Search & add products…** — opens the full-screen manager on the **Search** tab.
* **Manage products** (list icon) — opens the manager on the **Added** tab.

Each row also lets you **edit**, **remove**, **reorder** (drag), and **insert a block** at the cursor.

## Search & add products

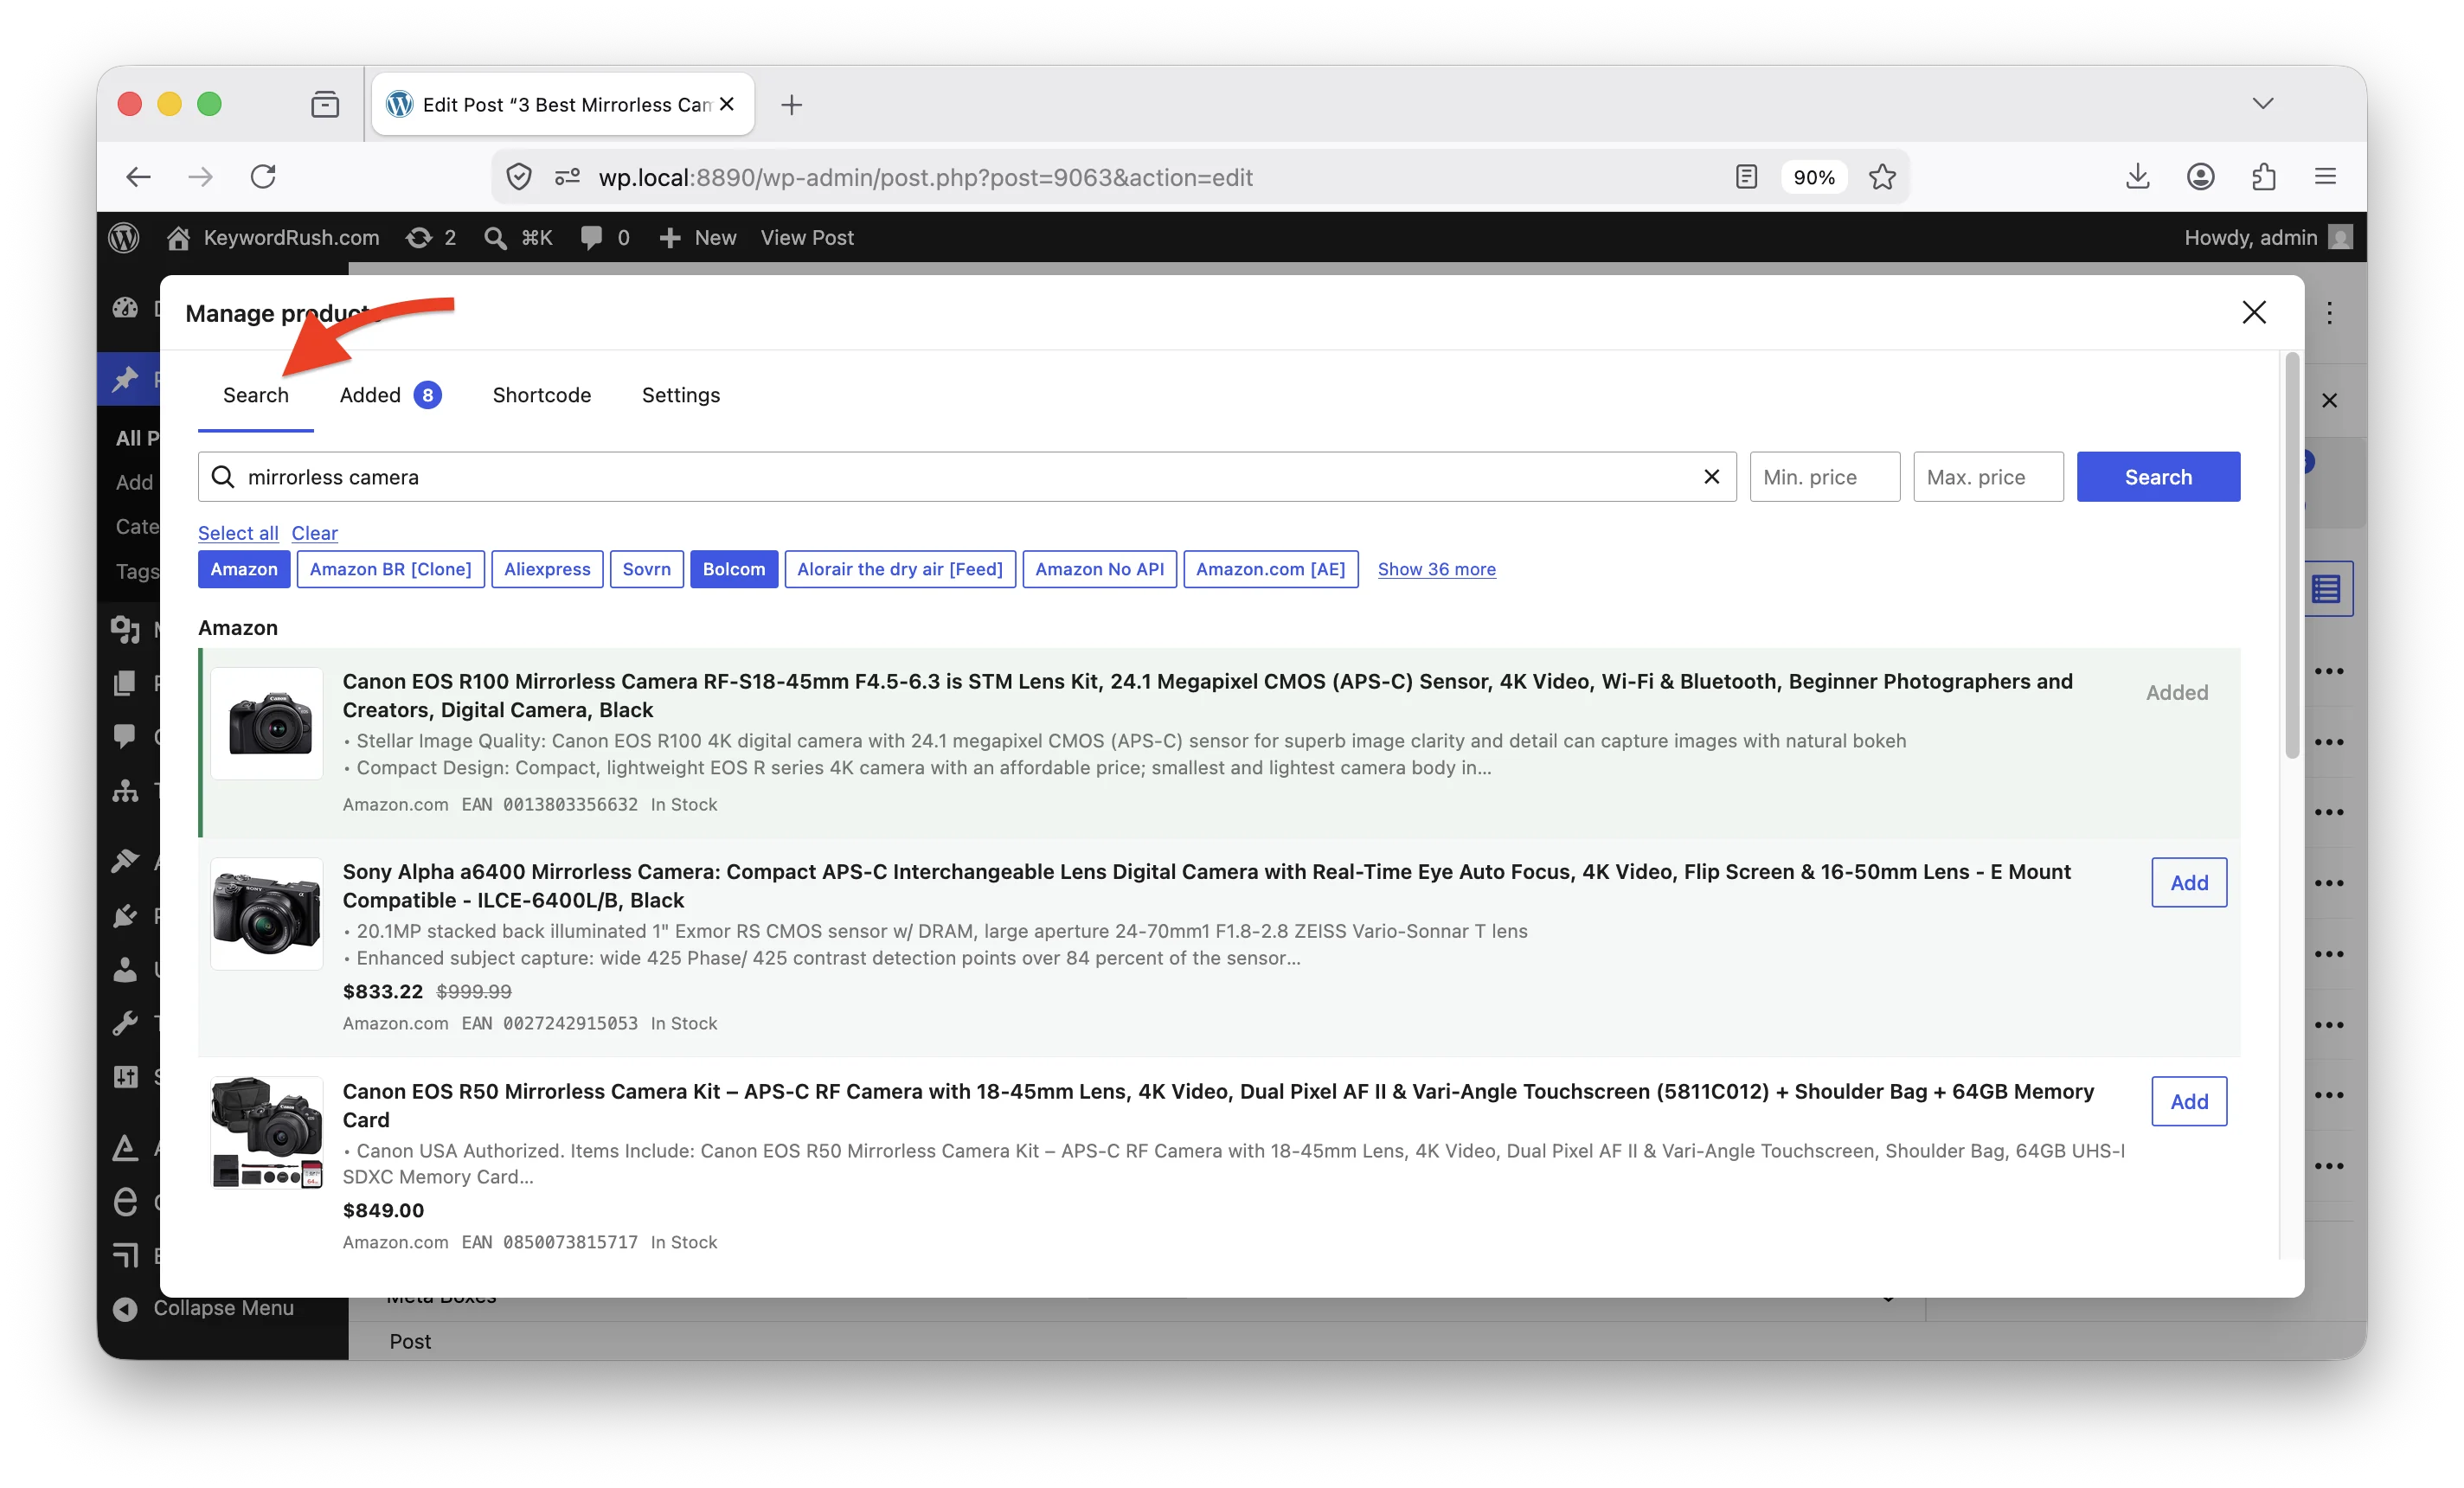
Click **Search & add products…** to open the manager on the **Search** tab.

* Type a **keyword** and search. Content Egg queries all your active modules at once and lists the results.
* Choose which **modules** to search. By default, the highest-priority module is preselected (priority is set in each module's settings).
* Click **Add** on a result — or click anywhere on the product row — to attach it. Products already on the post are flagged.

<figure><img src="/files/b8pxjFjG0JHzEgRWH1Dx" alt="The Search tab of the product manager, showing results across modules"><figcaption><p>Search your active modules and add products to the post</p></figcaption></figure>

The search box adapts to the modules you're searching — its placeholder shows what you can enter, for example *"Keyword, product URL, or EAN."*

* **Product URL** — some modules let you paste a product page URL to add that exact product.
* **EAN / GTIN** — some modules let you search by EAN. To match the same product across stores, see [Price comparison](/set-up-products/price-comparison-websites.md).

### Multiple keyword search

Enter several keywords separated by commas and Content Egg runs a separate query for each, then merges the results into one list. This is useful for [EAN/GTIN searches](/set-up-products/price-comparison-websites.md), and it also powers [product-list auto-update](/updating-products/updating-the-product-list.md) and [autoblogging](/set-up-products/autoblogging.md).

You can also assign results to [groups](/frontend/groups.md) directly from the search, using this syntax:

```
keyword1,keyword2,keyword3 -> group1,group2,group3
```

## Manage attached products

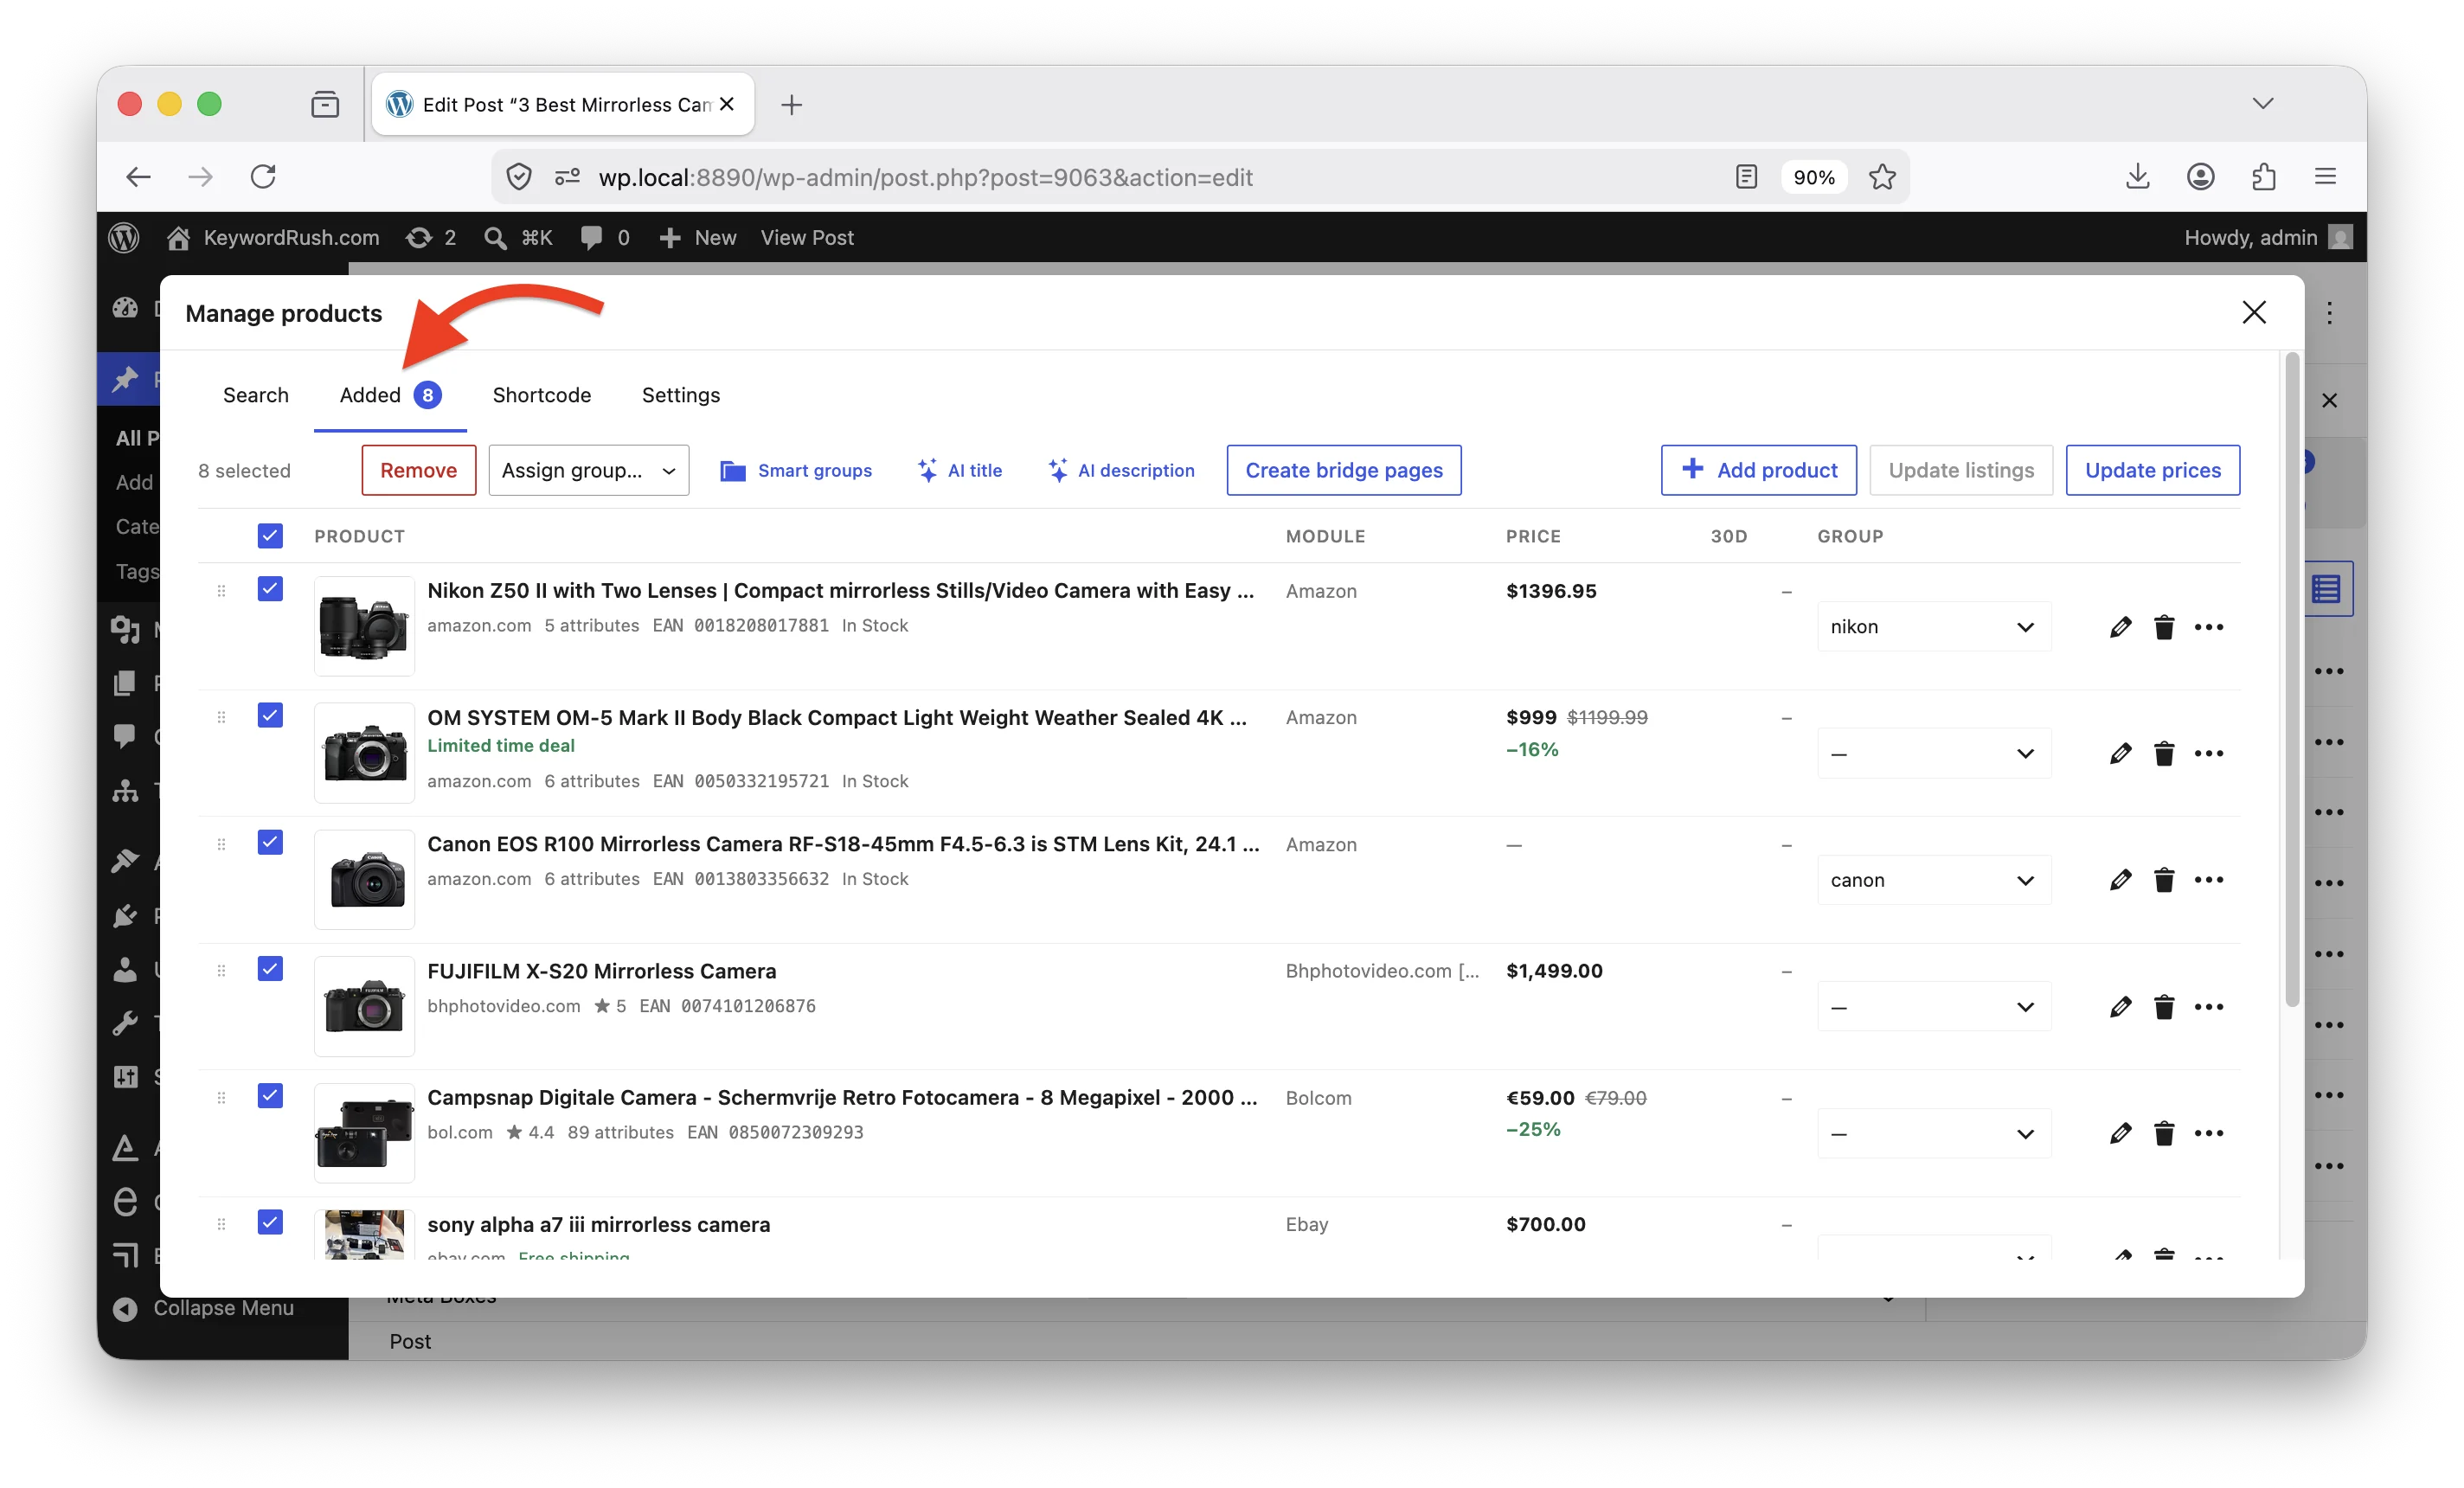
Open the **Added** tab (or click **Manage products**) to work with everything attached to the post:

* **Edit** a product's fields and description.
* Assign products to **groups**.
* **Reorder** by dragging, or **bulk remove**.
* **Refresh prices** to re-pull current price and availability.
* Generate an **AI title** or **description**.

<figure><img src="/files/1AZO1kTeTF5vImtbF0u4" alt="The Added tab of the product manager"><figcaption><p>Manage, group, reorder, refresh, and enrich attached products</p></figcaption></figure>

{% hint style="info" %}
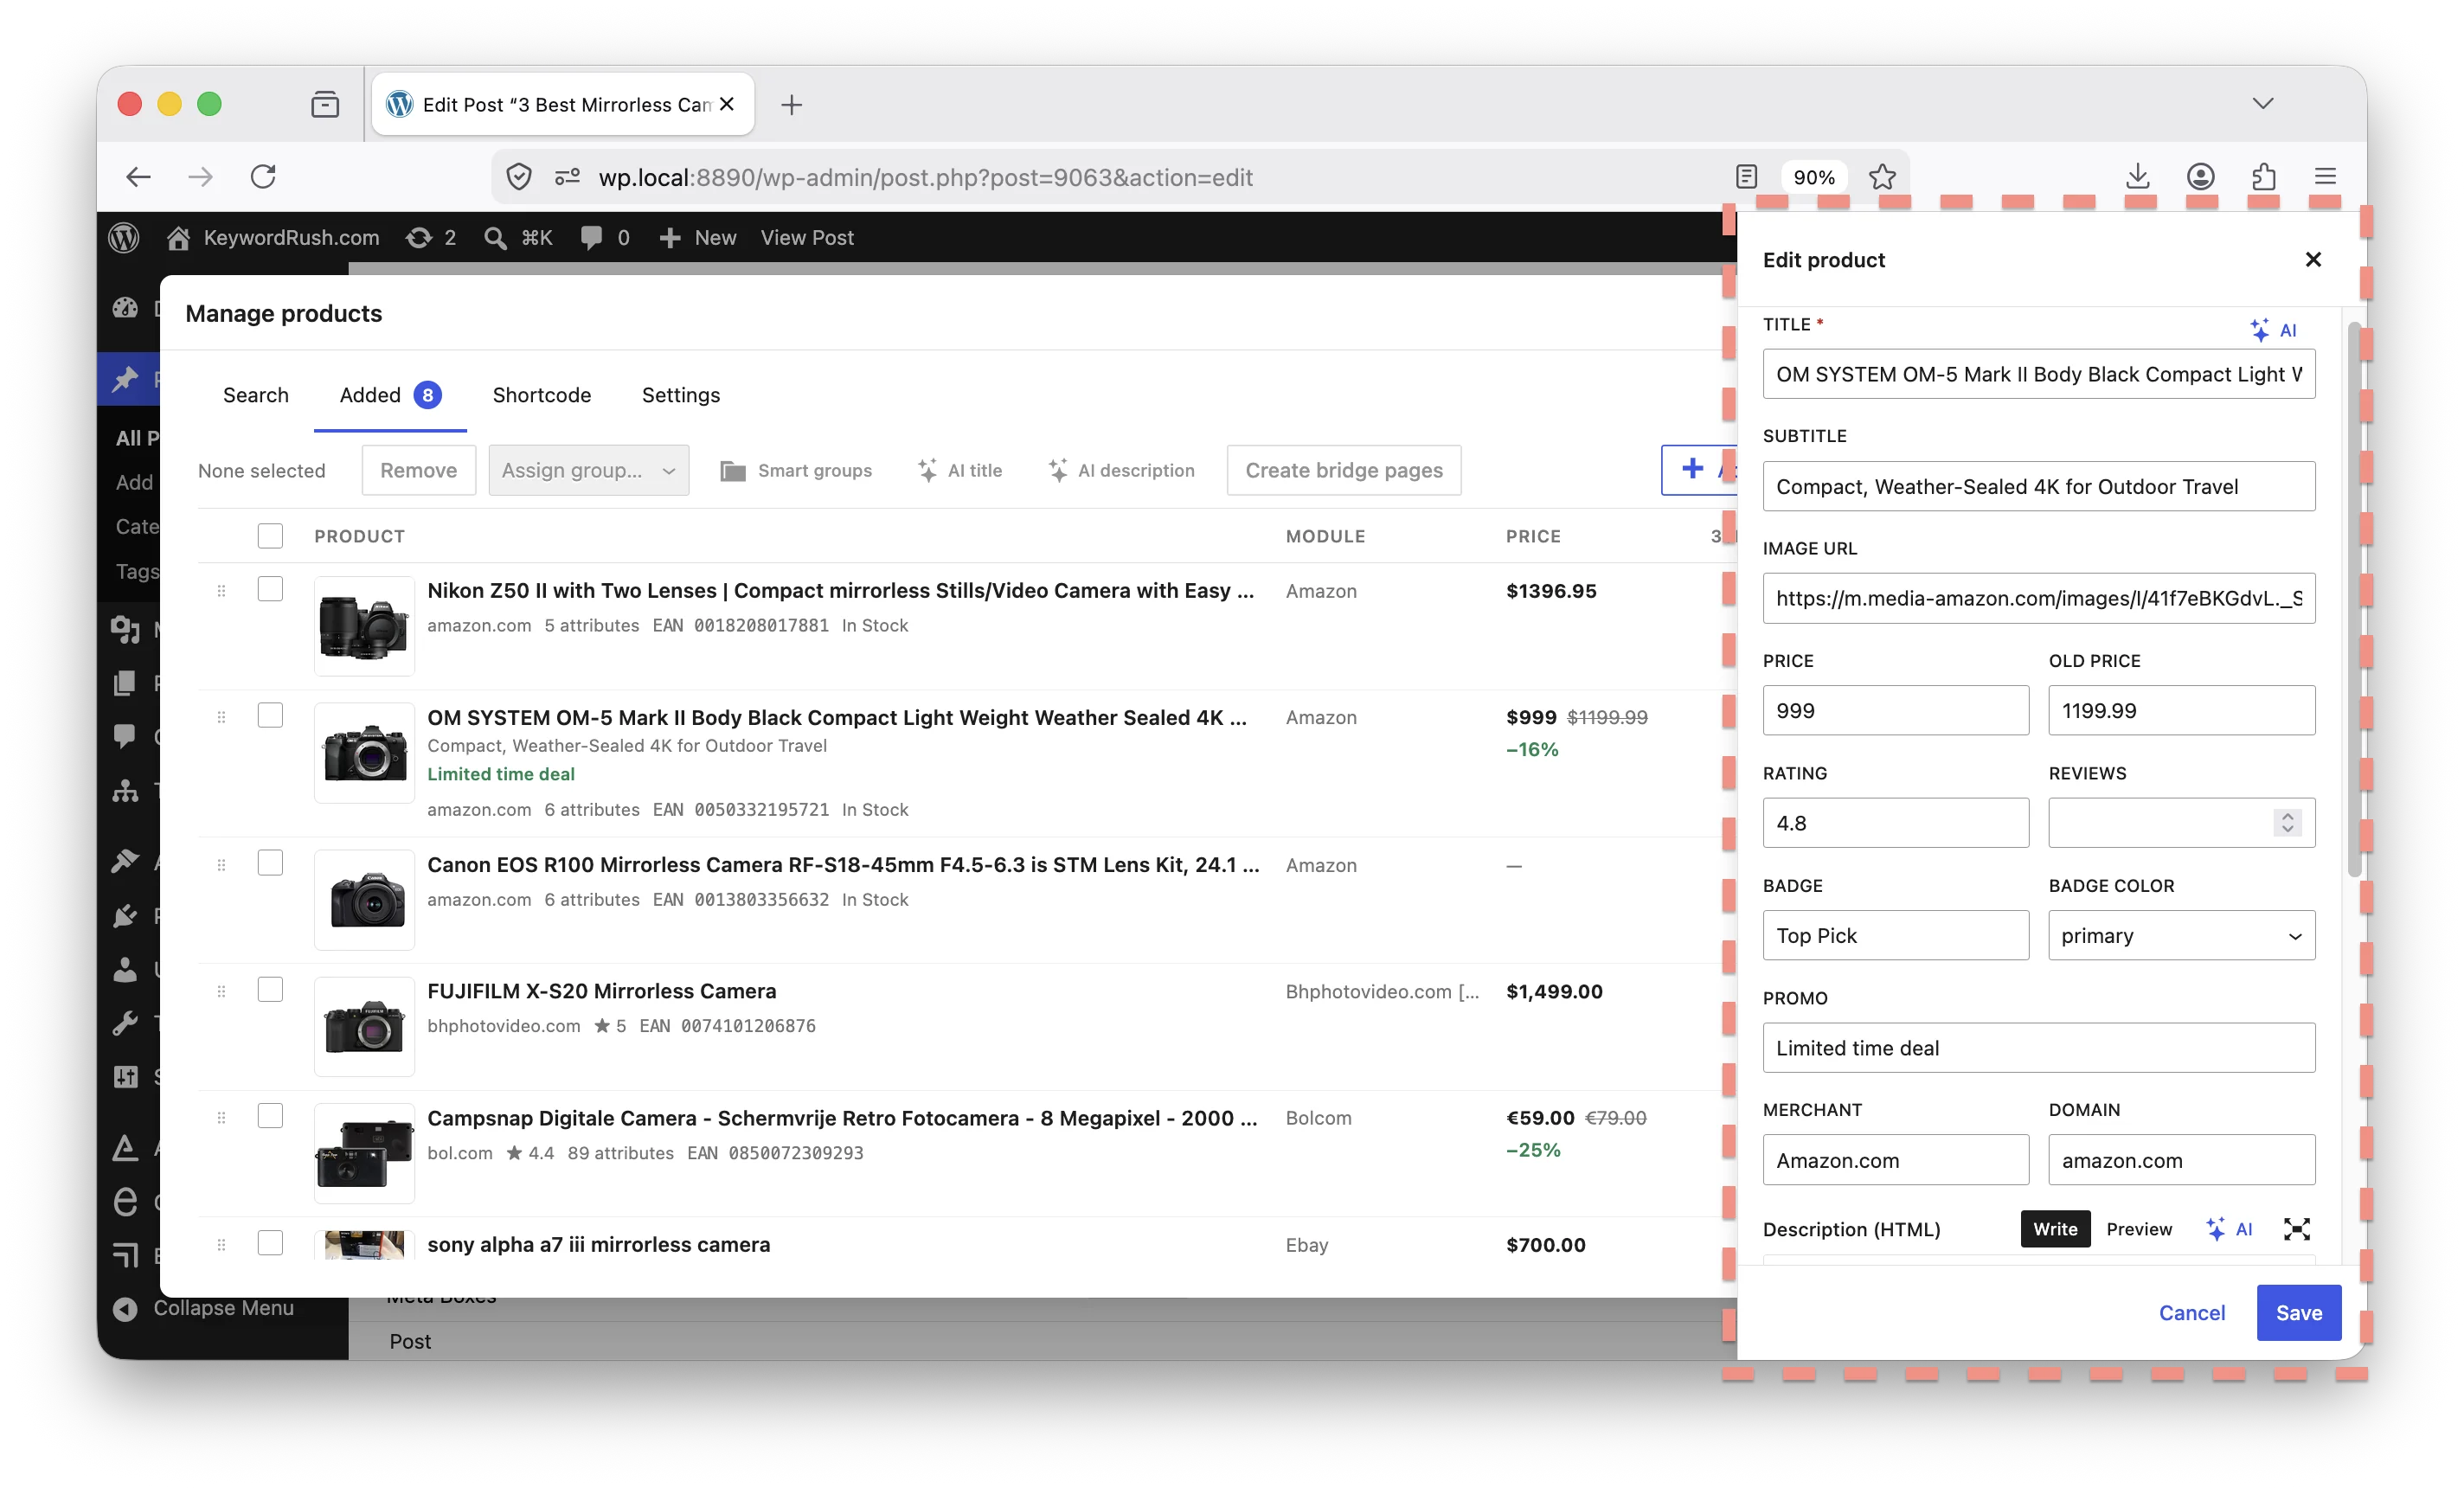
**Tip:** double-click any product on the Added tab to open its **edit drawer** — the fastest way to adjust fields, edit the rich-text description, or run the AI title/description.
{% endhint %}

### Editing a product

The edit drawer gives you the product's fields plus a rich-text **description** editor.

<figure><img src="/files/j3zJixd8fgwzAPrO0ZrM" alt="The product edit drawer with fields, description, and AI actions"><figcaption><p>The edit drawer — fields, rich-text description, and AI actions</p></figcaption></figure>

{% hint style="warning" %}
**AI title & description** need AI features enabled first. Go to **Content Egg → Settings → AI**, enter your API key, and configure the defaults. See [Activating AI features](/ai/activating-ai-features.md).
{% endhint %}

## Put the products on the page

Attached products are saved to the post automatically — a **block** renders them. You have two ways to place one:

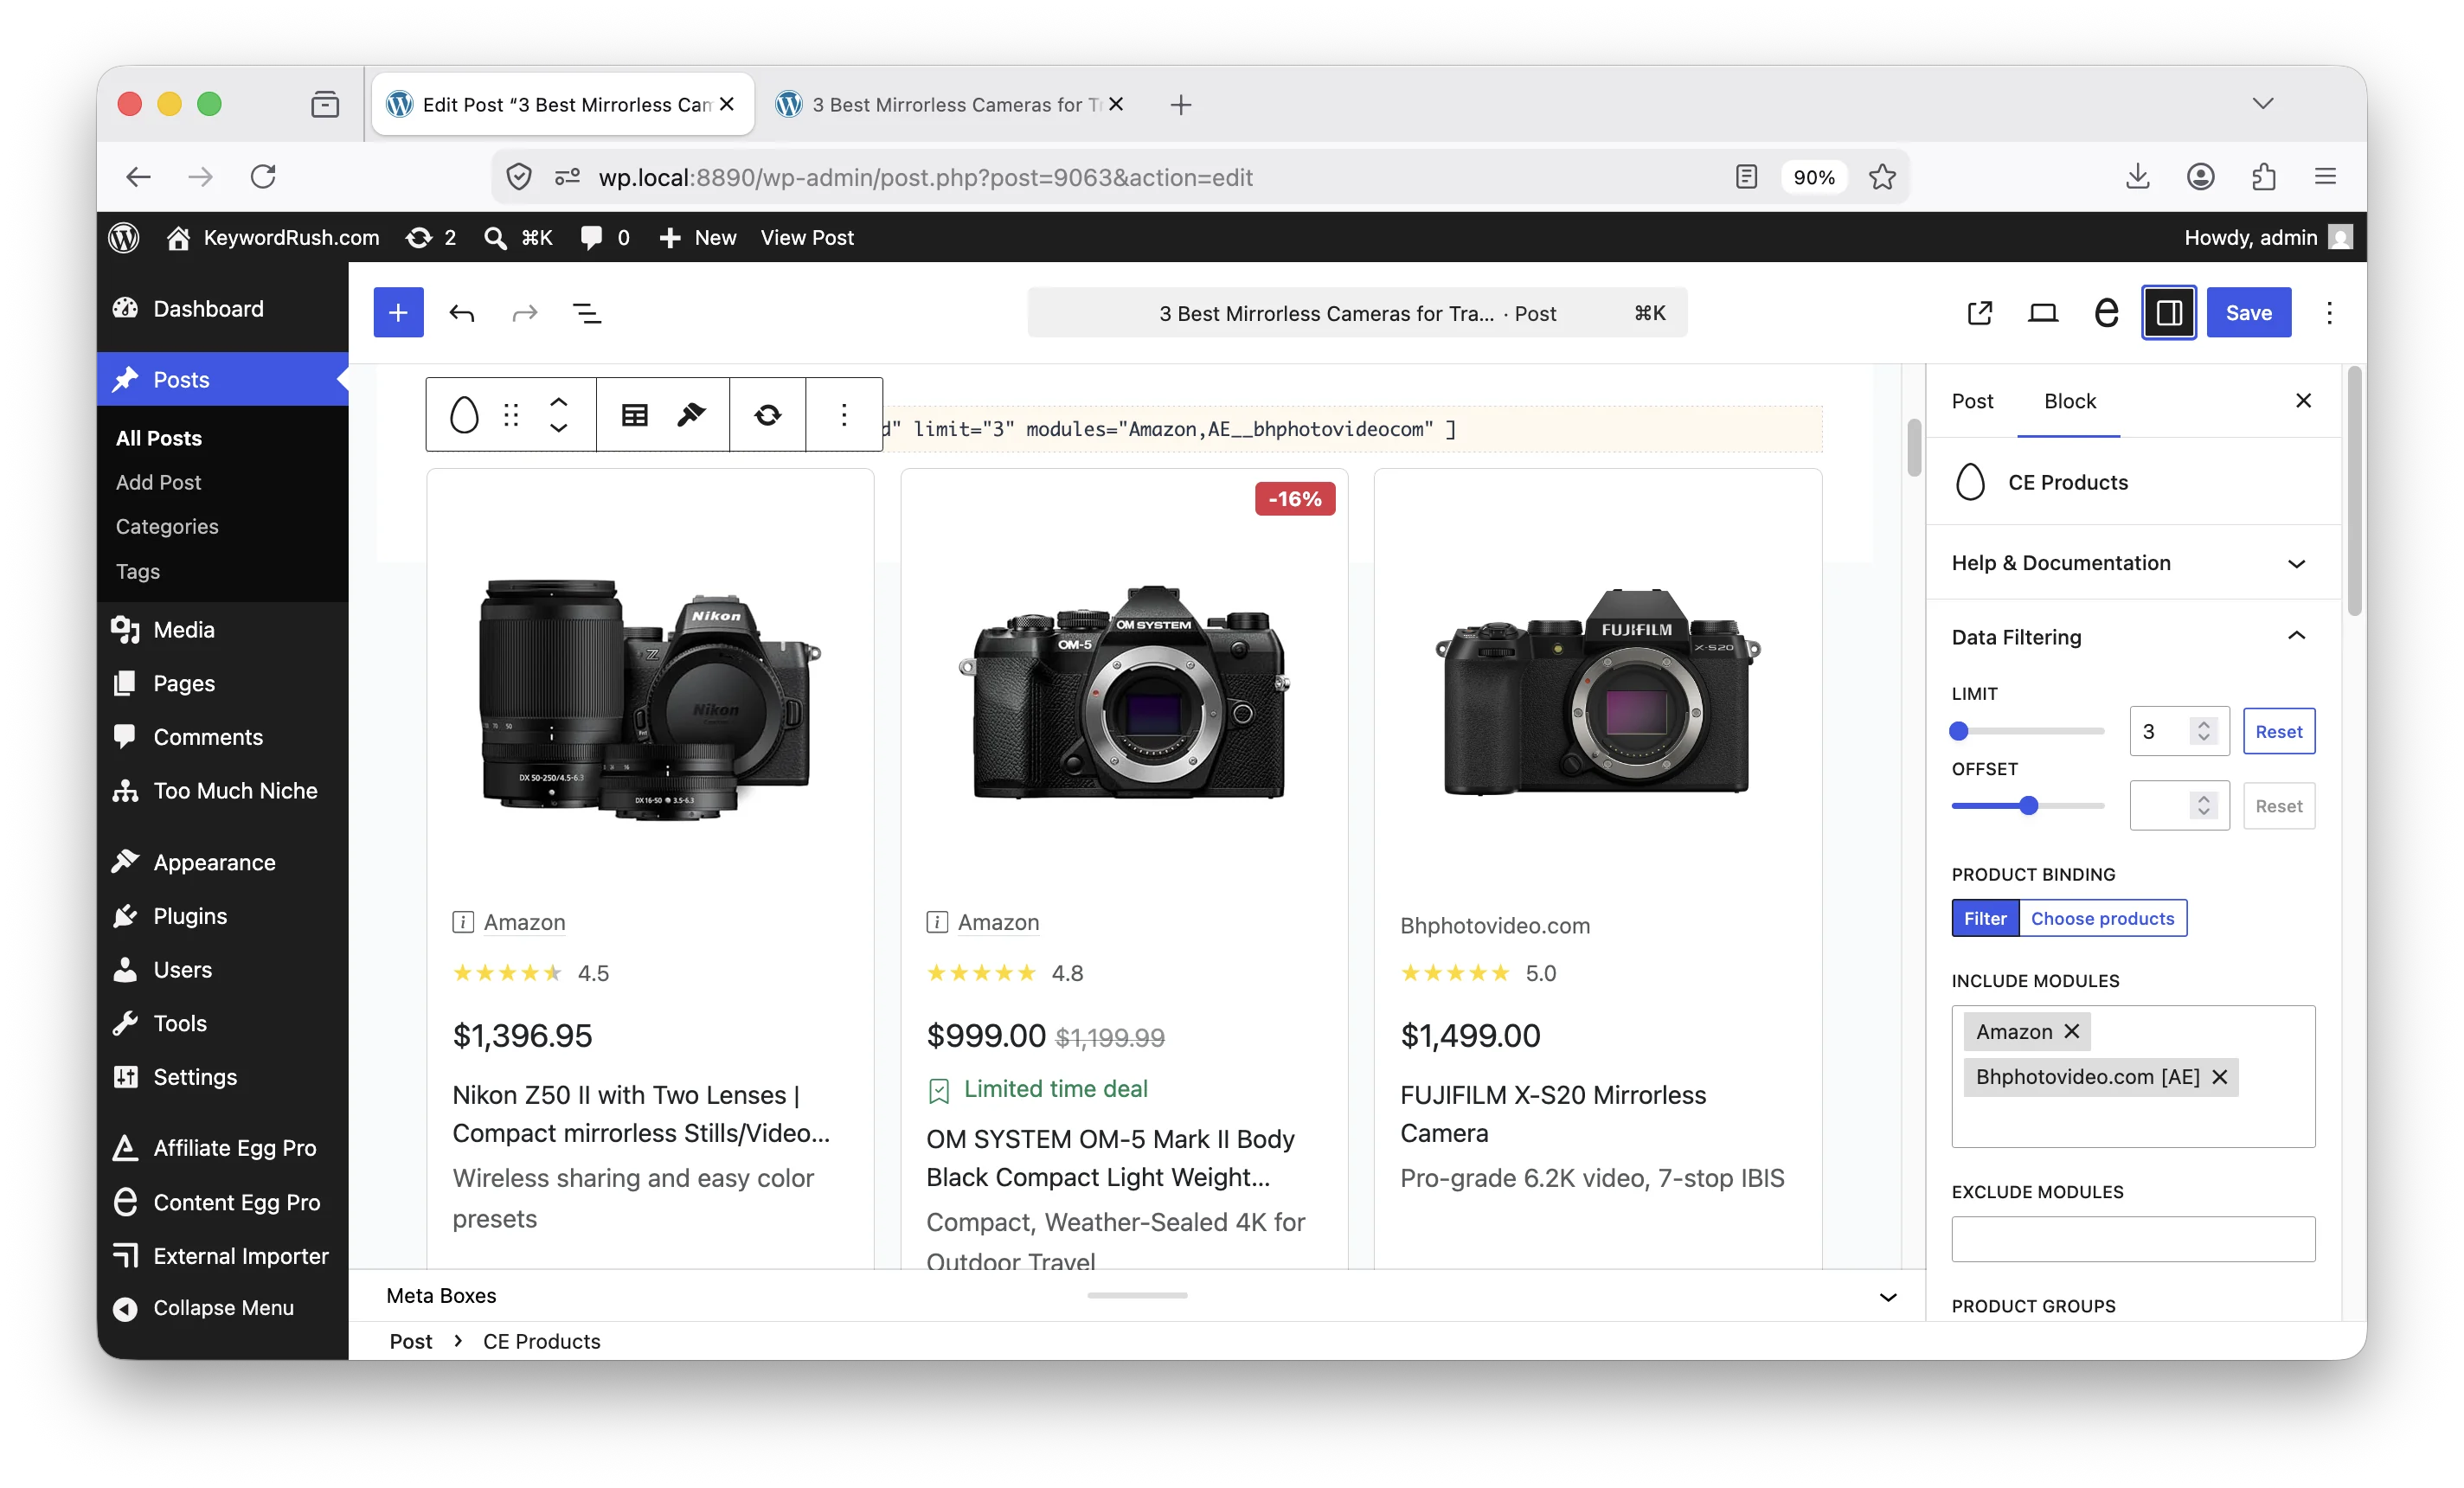
1. **By filter** — insert the **CE Products** block from the block inserter (under the **Content Egg** category). By default it renders products by filter: all modules, or the modules/groups you choose.
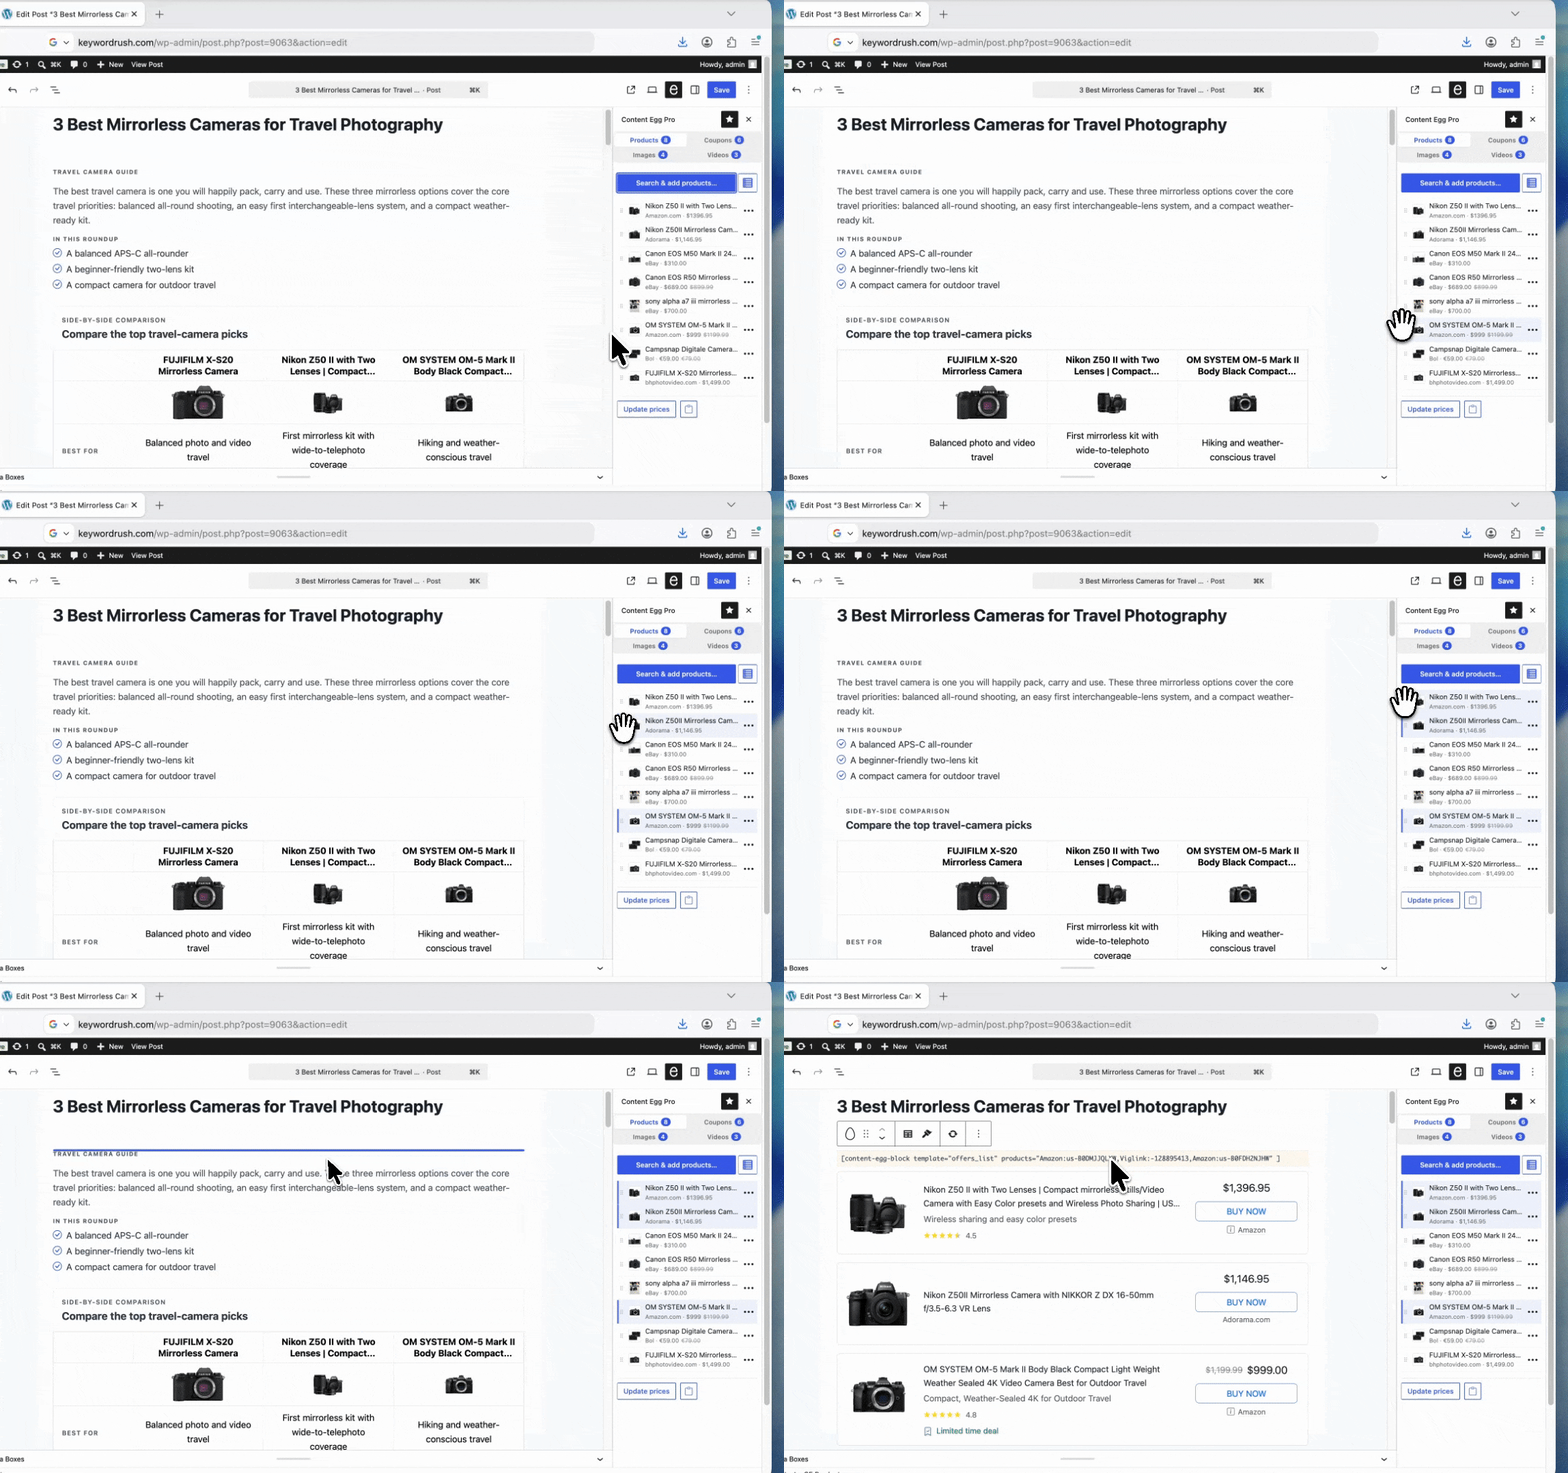
2. **Bound to specific items** — from the panel or the Added tab, drag an item into the editor (or use **insert**) to drop a CE Products block bound to exactly those products. Select several with **Ctrl/Shift** and drag them together to build a product list.

<figure><img src="/files/e4jED8oQ0aZHCNiYAix0" alt="Dragging products from the Product Manager into the editor to create a bound CE Products block"><figcaption><p>Drag products from the panel into the editor — select several with Ctrl/Shift to drop them as one list</p></figcaption></figure>

You can also start from the block: add an empty **CE Products** block, then open the Product Manager right from the block's sidebar to search and bind products to it.

<figure><img src="/files/kCb0pp9ybOPkI7kHiFCu" alt="A CE Products block rendering attached products in the editor"><figcaption><p>The CE Products block renders your products — by filter or bound to specific items</p></figcaption></figure>

For all block settings — template, filter vs binding, columns, showing or hiding fields — see [Gutenberg product blocks](/frontend/gutenberg-blocks.md).

## Build a shortcode

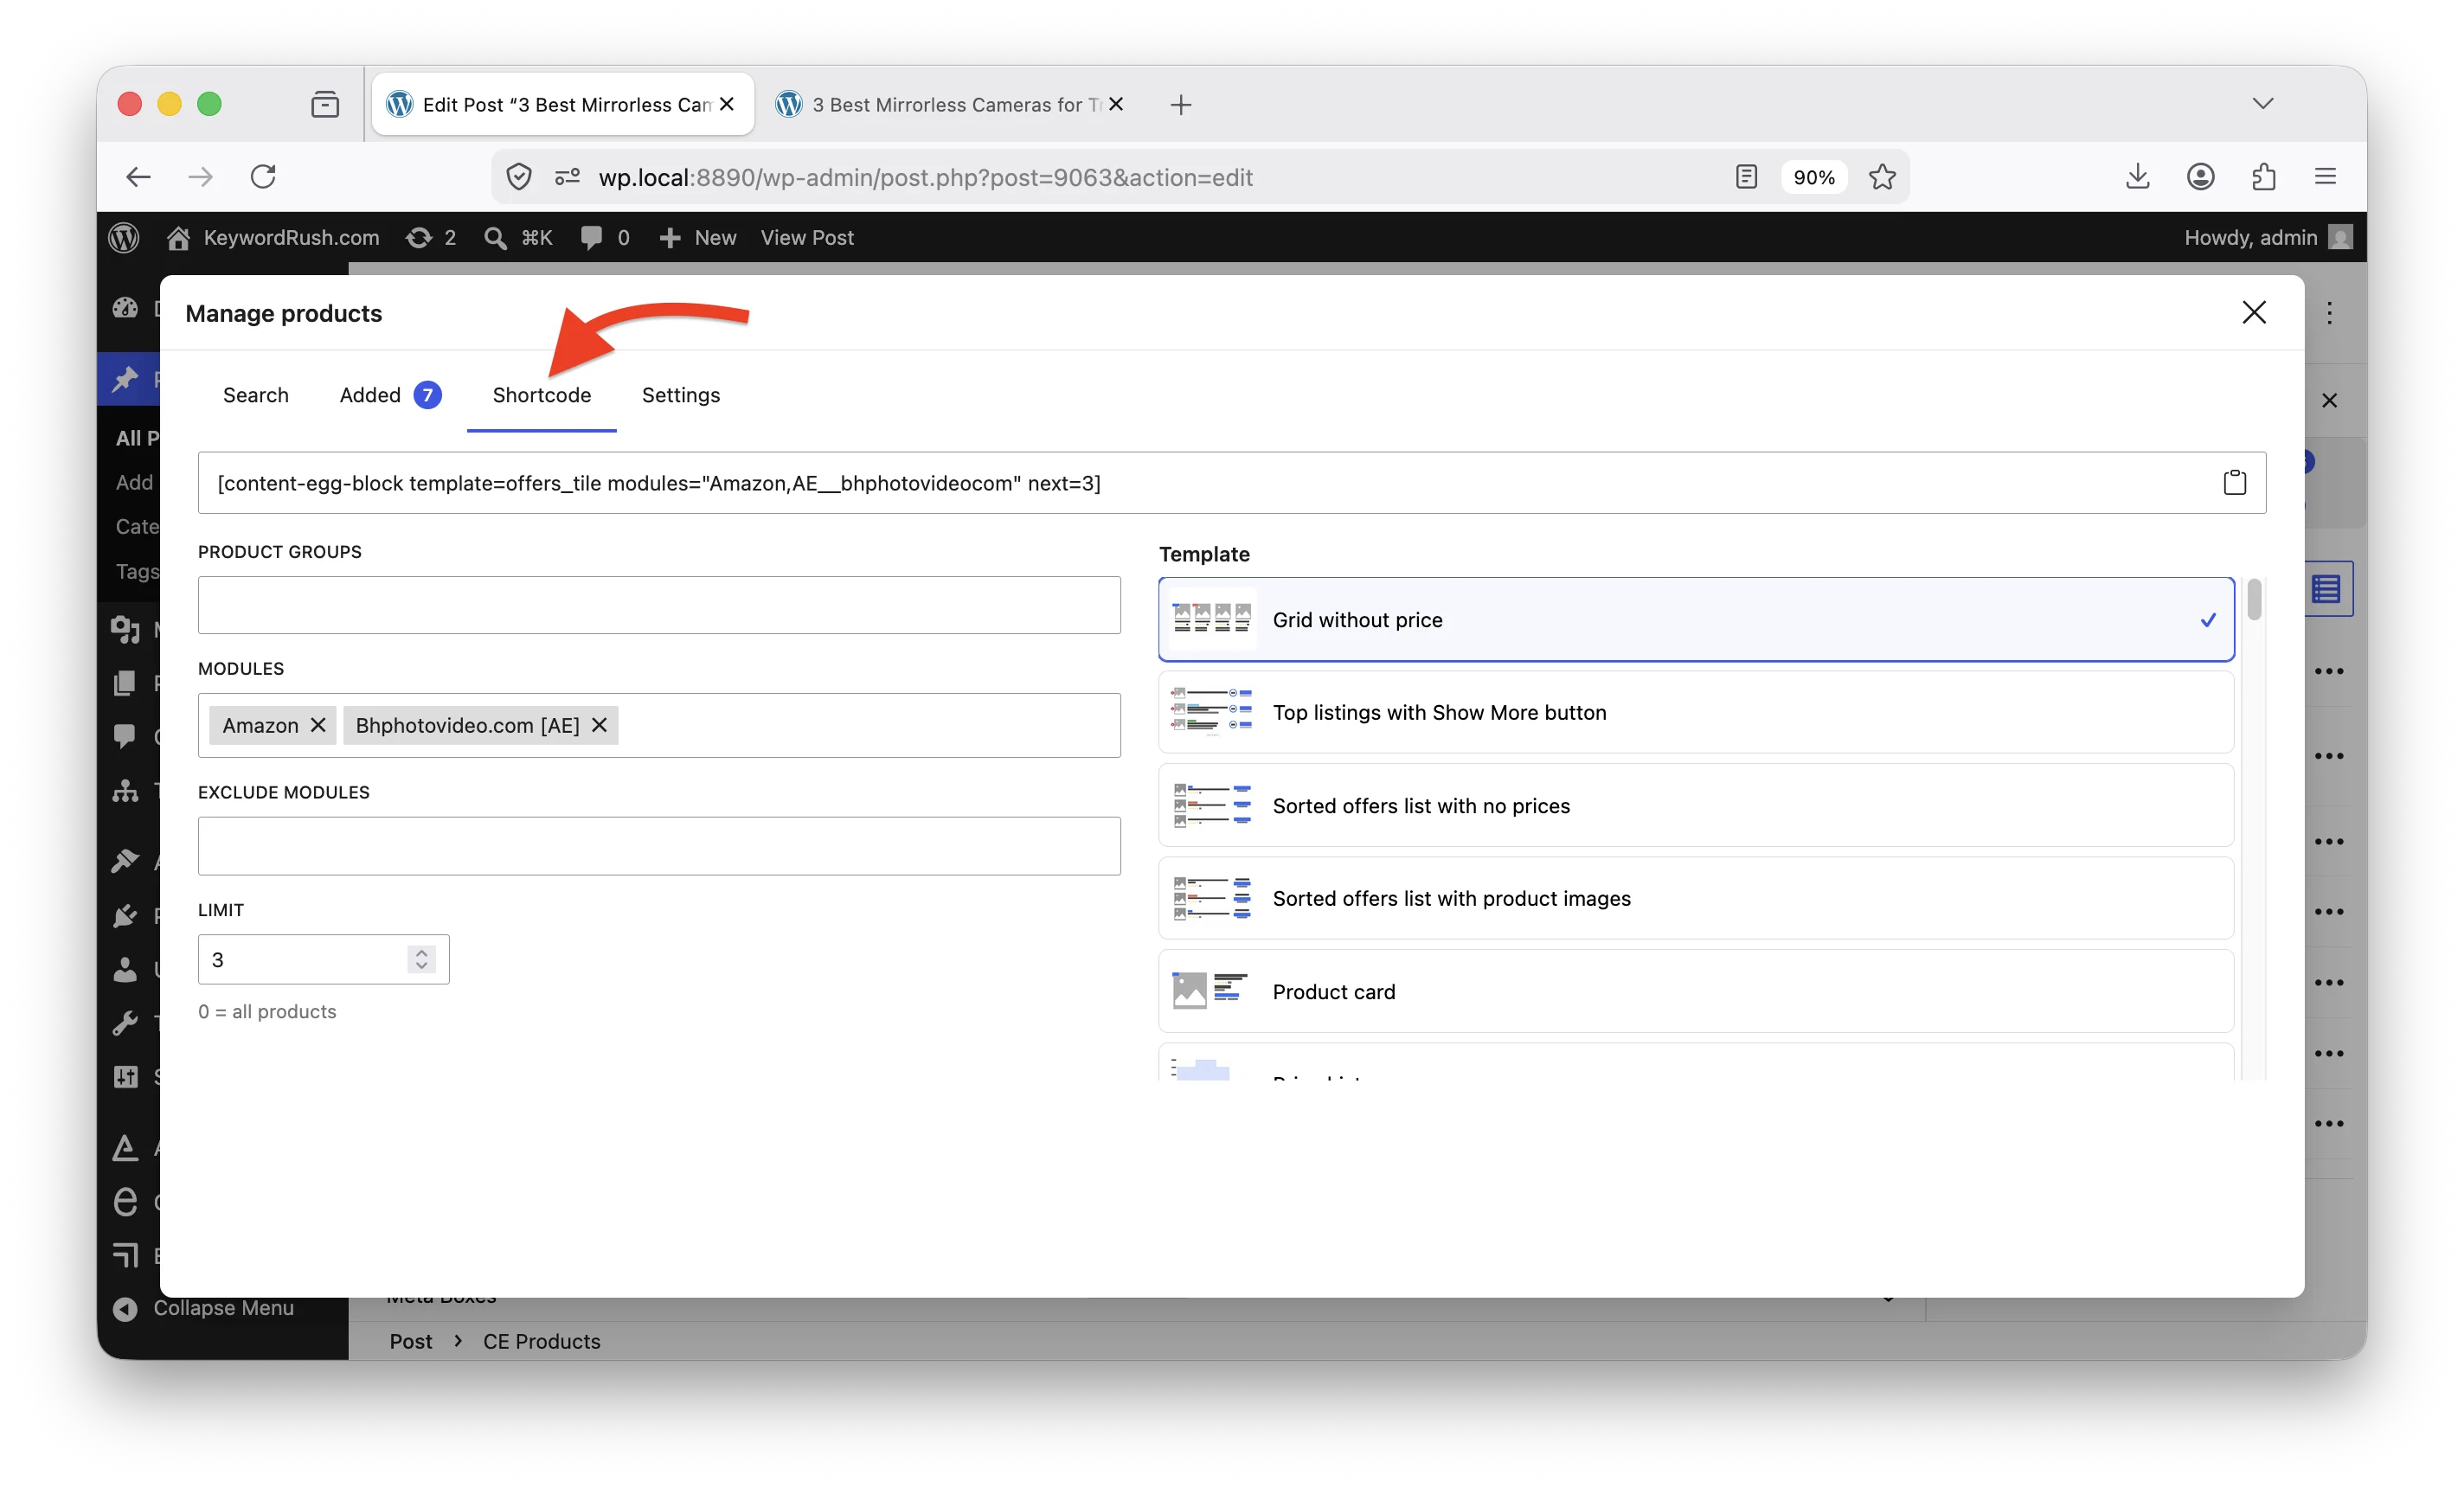
The manager's **Shortcode** tab generates a `[content-egg-block]` shortcode you can paste anywhere. It's most useful in the **classic editor**, but not only — shortcodes expose more parameters than blocks and let you select **custom templates**.

Configure:

* **Product groups**
* **Modules**
* **Exclude modules**
* **Limit**
* **Template** (including custom templates)

Copy the generated shortcode and paste it into your content. See [Shortcode parameters](/frontend/shortcode-parameters.md) for the full parameter list.

<figure><img src="/files/1A6uPkwA7oYDavCLpAs4" alt="The Shortcode builder tab of the product manager"><figcaption><p>Build a [content-egg-block] shortcode with groups, modules, limit, and template</p></figcaption></figure>